Use monitors to leverage your GSLB setup
Citrix ADC's GSLB feature optimizes user experience by routing traffic to the best datacenter. However, it may direct users to faulty locations. By implementing monitors for your resources, you can enhance GSLB to prevent redirecting users to non-functional datacenters, ensuring the best experience.
If you're not familiar with Citrix ADC's GSLB feature, let me summarize in a few words how this works and might help you with your deployment.
Let's assume you are a medium/large company spread across the globe, with several datacentres (for this example, we'll have one in New York and another one in London), and you want to offer the best **user experience** to your employees, partners or consultants when they work remotely (in this demo, I'll use Citrix published apps and desktops but it can be adapted to any resources you might need to publish externally through your ADC). To lower the latency, you don't want someone working from Liverpool to be redirected to your New York datacentre, it should connect to your UK datacentre. But, you still want to be able to redirect this user in the US if your British datacentre has an outage.
To route your users to the best location but also to minimize the impact of an issue and redirect them to any other datacentre, the GLSB may help you with this. Based on a specified mechanism, it knows where to route the users. You might want to use, among many other possibilities to use least response time (which doesn't mean the first ADC to respond will be the one elected...), static proximity (meaning the user will be routed based on his geographical location).
GSLB is a great mechanism offered by Citrix ADC.
But it has caveat.
In my example, I use round-robin to use both datacentres. Each time I do a request to my GSLB URL, I am redirected to the first one, the request after to the second one, then back to the first, and so on.

Let's say you want to use the GSLB to optimize the routing to your Citrix Gateways. The GSLB, by default, will consider New York's Gateway as up as long as the gateway virtual server is responding on port 443 (if Gateway is hosted on another instance) or as long as the gateway virtual server is up (if hosted on the same instance).
To have a gateway appearing as up, you need only two things: a valid SSL certificate bound to the virtual server and at least one STA up.
What about the Storefront, the authentication server, DNS server, Desktop Delivery Controllers (might be different from the STA)? It is not part of the virtual server status evaluation.
In my example, my storefront server is down...
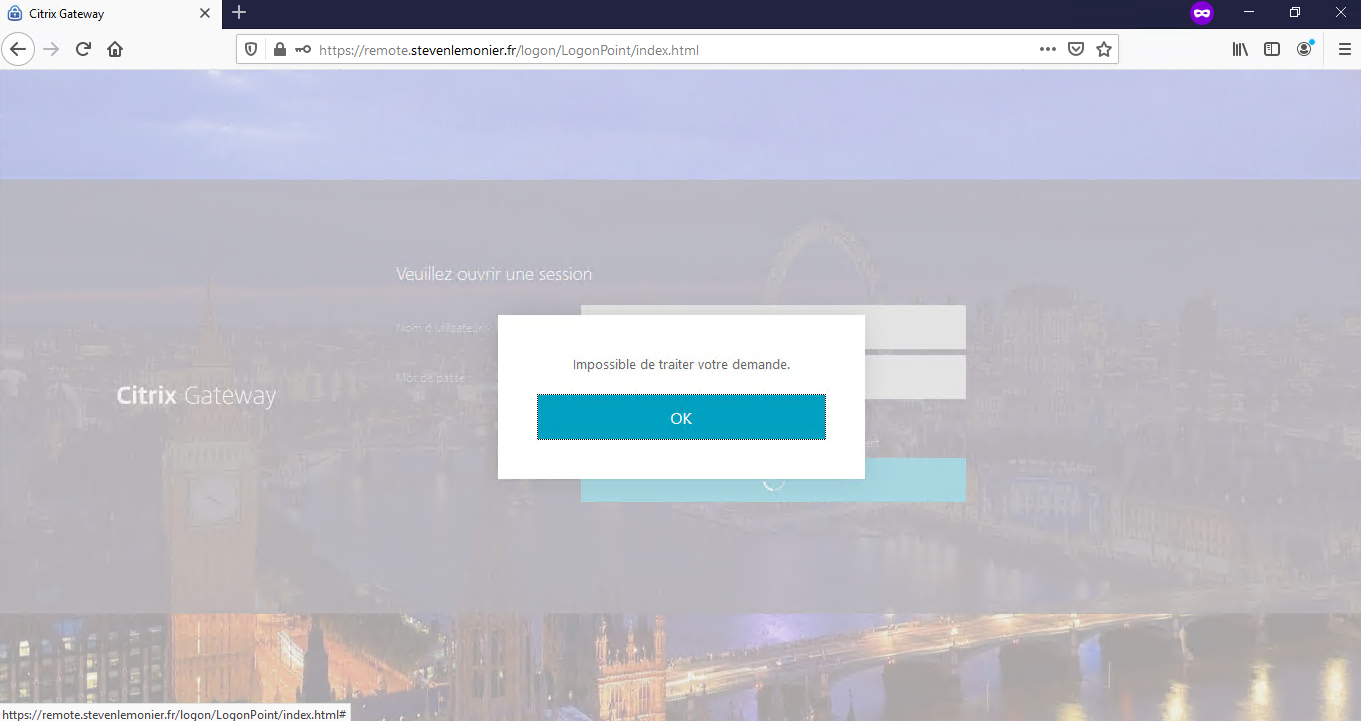
... but I'm still redirected in London, ending with a login failure (and a frustrated user).
You don't want to route a user to a location where it would be unable to logon, or launch any resources if you use GSLB. Remember, user experience is key.
To be fair, it's not a GSLB limitation, but a Citrix Gateway one.
Thankfully, we can add monitors to the GSLB setup to leverage the feature and be able to route efficiently the users where we want and prevent them to connect to a faulty datacentre.
But it requires some work.
In my example, I will use the following deployment.
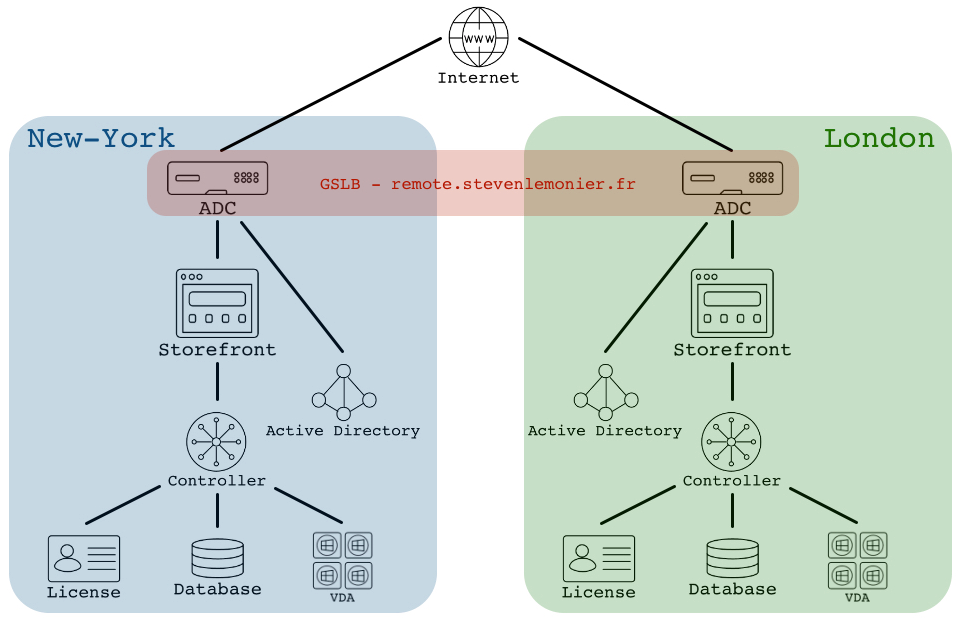
I assume your GSLB configuration is already set up and works like a charm.

I will add monitors to the following resources:
- DNS server(s)
- Authentication server(s), here an Active Directory server
- Storefront server(s)
- Delivery Controller(s)
You might want to add another one(s), specially if you use two-factor authentication, or use a different one(s) depending on your deployment (like RD Gateway).
As long as you understood how to proceed with one monitor, you'll be able to adapt to your configuration.
To configure monitors, you'll need as many IP addresses as services you'll need to monitor because we'll have to set up load balancing virtual servers.
Why just simply bind multiple monitors for the same service? Because a monitor can only target one IP address. It means you'll need to bind two different monitors, each one targeting one storefront server. But in case one of them goes down, the GSLB site will be considered as down, which is incorrect.

Now, it's time to work.
As usual, try this in a safe environment first and adapt the configuration to your deployment.
First, let's configure each Load Balancing Virtual server in New York datacentre. You might want to use one IP address for different services, depending on the number of IP addresses you can get. It is really up to you but I recommend dedicating an address to one service.
I'll detail everything for the DNS and then, you'll have all the commands with few comments depending on the service.
1. Add a Load Balancing Virtual server using the IP address 192.168.100.202
add lb vserver NY-LB-DNS DNS 192.168.100.202 53 -persistenceType NONE -cltTimeout 120
2. Add your internal DNS server (mine is named NY-DNS01 and has 192.168.200.1 set as its IP address)
add server NY-DNS01 192.168.200.1
3. Create the Load Balancing service group
add serviceGroup NY-LB_svcg-DNS DNS -maxClient 0 -maxReq 0 -cip DISABLED -usip NO -useproxyport NO -cltTimeout 120 -svrTimeout 120 -CKA NO -TCPB NO -CMP NO
4. Bind your DNS server to the Load Balancing service group
bind serviceGroup NY-LB_svcg-DNS NY-DNS01 53
5. Bind your service group with your Load Balancing virtual server
bind lb vserver NY-DNS NY-LB_svcg-DNS
6. (Repeat step 2 and 4 for each DNS server you want to use in your Load Balancing virtual server)

Let's create a LB virtual server for LDAP (I won't create a new server and will re-use the DNS one, both services are hosted on the same server in my lab - 192.168.100.1). Note I use LDAP in my lab, it is highly recommended to use LDAPS instead in your production environment.
add lb vserver NY-LB-NYAP TCP 192.168.100.203 389 -persistenceType NONE -cltTimeout 9000
add serviceGroup NY-LB_svcg-LDAP TCP -maxClient 0 -maxReq 0 -cip DISABLED -usip NO -useproxyport YES -cltTimeout 9000 -svrTimeout 9000 -CKA NO -TCPB NO -CMP NO
bind serviceGroup NY-LB_svcg-LDAP NY-DNS01 389
bind lb vserver NY-LB-LDAP NY-LB_svcg-LDAP
Now, it's up to Storefront LB virtual server. Again, I use HTTP in my lab, use HTTPS in your production environment.
add lb vserver NY-LB-SF HTTP 192.168.100.204 80 -persistenceType NONE -cltTimeout 180
add server NY-SF01 192.168.100.3
add serviceGroup NY-LB_svcg-SF HTTP -maxClient 0 -maxReq 0 -cip DISABLED -usip NO -useproxyport YES -cltTimeout 180 -svrTimeout 360 -CKA NO -TCPB NO -CMP NO
bind serviceGroup NY-LB_svcg-SF NY-SF01 80
bind lb vserver NY-LB-SF NY-LB_svcg-SF
And Finally, Delivery Controllers LB virtual server. You know the story, HTTP/HTTPS, lab/production...
add lb vserver NY-LB-DDC TCP 192.168.100.205 80 -persistenceType NONE -cltTimeout 9000
add server NY-DDC01 192.168.100.6
add serviceGroup NY-LB_svcg-DDC TCP -maxClient 0 -maxReq 0 -cip DISABLED -usip NO -useproxyport YES -cltTimeout 9000 -svrTimeout 9000 -CKA NO -TCPB NO -CMP NO
bind serviceGroup NY-LB_svcg-DDC NY-DDC01 80
bind lb vserver NY-LB-DDC NY-LB_svcg-DDC
Now, you should have all your Load Balancing virtual servers up and running.

Reproduce the same configuration (with specific IP addresses, of course!) in your other datacentre. In my case, I did it in London.

Now, it's time to create the monitors and bind them to the GSLB site. ADC has great monitors ready to be used to check everything works as expected.
For DNS monitor, we'll do a query for an FQDN (sf01.ny.local) and expect a specific answer (192.168.100.3) and we'll ask our DNS load balancing virtual server (192.168.100.202) on the DNS port (53).
add lb monitor NY-DNS DNS -query sf01.NY.local -queryType Address -LRTM DISABLED -destIP 192.168.100.202 -destPort 53 -IPAddress 192.168.100.3
Then we attach the monitor to our GSLB site.
bind gslb service remote.stevenlemonier.fr-NY -monitorName NY-DNS
For LDAP, there is an LDAP query, using credentials, here in plain text but would appear encrypted in the ns.conf then. It just expects to get a correct answer from your Active Directory server.
add lb monitor NY-LDAP LDAP -scriptName nsNYap.pl -dispatcherIP 127.0.0.1 -dispatcherPort 3013 -password MyS3cuR3P@ssw0rd -LRTM DISABLED -destIP 192.168.100.203 -destPort 389 -baseDN "DC=NY,DC=local" -bindDN sleadm@NY.local -filter cn=builtin
bind gslb service remote.stevenlemonier.fr-NY -monitorName NY-LDAP
Storefront has also a dedicated monitor (isn't that great, huh?). It will try to reach a store name ("store" like in /Citrix/"Store") on your load balancing virtual server.
add lb monitor NY-SF STOREFRONT -scriptName nssf.pl -dispatcherIP 127.0.0.1 -dispatcherPort 3013 -LRTM DISABLED -destIP 192.168.100.204 -destPort 80 -storename store
bind gslb service remote.stevenlemonier.fr-NY -monitorName NY-SF
Guess what... Yep, there is one for Desktop Delivery Controller as well (I really enjoy well-designed stuff like this).
add lb monitor NY-DDC CITRIX-XD-DDC -LRTM DISABLED -destIP 192.168.100.205 -destPort 80
bind gslb service remote.stevenlemonier.fr-NY -monitorName NY-DDC
🥵 Okay, we are reaching the end. Let's do a GSLB synchronization to spread our monitors across our deployment.
shell nsgslbautosync config -nowarn
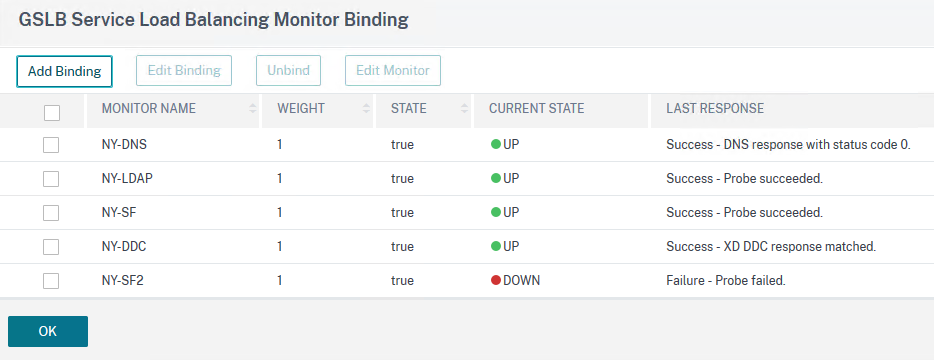
And then, let's check our GSLB services status on New York ADC.
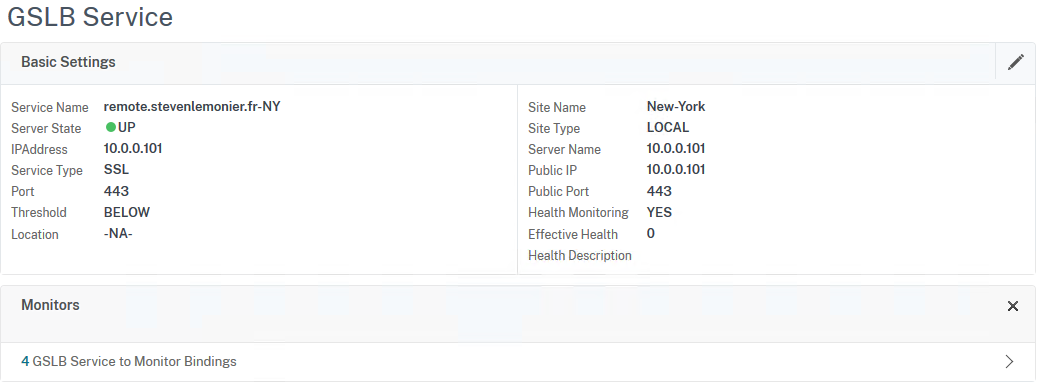
What if we check from London...

It appears as down. As expected.
Wait. What?

Yep, this is expected. Let me explain.
As soon as you start to use monitors and bound them to a GSLB Service, these monitors are created on the other GSLB Services hosted on your other GSLB Site. But they still point to the same IP addresses... which are probably not reachable by all your ADC.
In my case, I use 192.168.100.0 for New York and 192.168.200.0 for London. My ADCs are in two-arms mode, one on Internet, one on its datacentre's LAN. But they do not communicate with the other datacentre. New York and London are sealed.
I did that to highlight a disadvantage of this setup: each GSLB site has to communicate with all the IP addresses the monitors are pointing to, meaning your Load Balancing virtual servers.
It's the limitation of using the monitors. The ADC won't trust the other GSLB site regarding the status and will run its own monitor to check the availability of the services. Is it good or is it bad, I don't know. I think the monitors should be site's specific but Citrix implemented it that way for a purpose, I guess.
But don't worry, more likely, your datacentres are not sealed like in my lab and would probably communicate with each other. If not, it could be only a matter of firewall rules or network routes, nothing too hard to tackle. 😊
After setting a three-arms mode on my ADC, they are able to use the monitors properly.


From now on, users from the UK won't be redirected to London as one of the services involved in the Gateway is faulty, instead, they'll connect to New York until the service is restored in the other datacentre. And that is great!
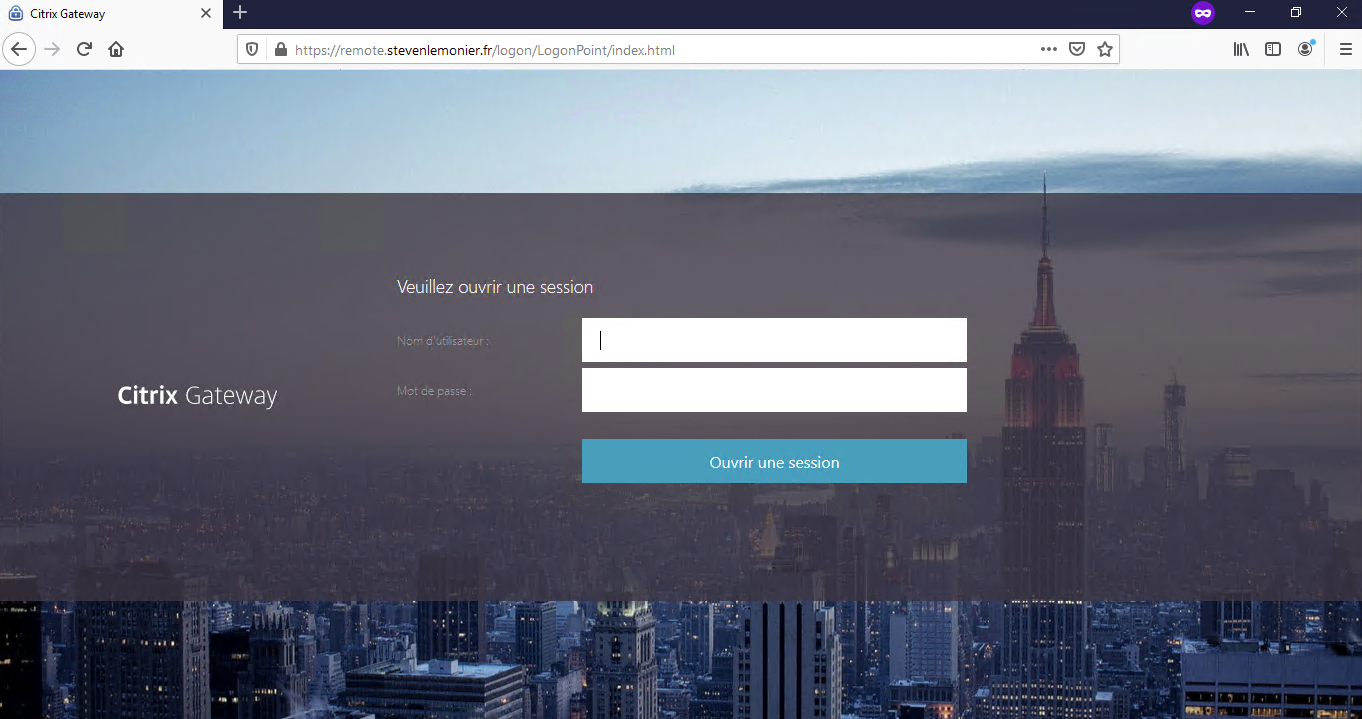
In conclusion, with the monitors, we just improved the GSLB setup. Its first purpose was to improve the user experience by routing them to the best location (based on the chosen mechanism: least response time, static proximity, etc.) no matter resources availability but now, users won't be redirected to a faulty datacentre.
Remember, however, you might need to work to allow your ADC to communicate with your load balancing servers to monitor them properly but the improvement for your users is worth it.